
Picture this situation: you’re stuck in heavy summer traffic, the asphalt is radiating enormous heat, and suddenly the red temperature light comes on in your dashboard.
The engine is overheating.
This is one of the most stressful situations for any rider. If you keep riding and ignore the problem, excessive temperature can lead to serious damage:
- warping of the cylinder head;
- damage to the head gasket;
- loss of coolant;
- overheating of the oil;
- severe engine damage.
Many riders see the cooling system as something too complex to work on at home.
In reality, its basic maintenance is relatively easy once you understand how the system works and follow the correct sequence.
In this article we will look at:
- why a motorcycle can overheat;
- what the difference is between air and liquid cooling;
- how to check the main causes of high temperature;
- how to properly drain and flush the cooling system;
- how to refill the system without leaving air in it.
Why Does a Motorcycle Overheat?
During operation, the engine produces an enormous amount of heat.
The cooling system must constantly carry away part of this heat and keep the engine within its normal operating temperature range.
When the temperature starts to climb too high, it means the engine is producing more heat than the system can dissipate.
Here are three of the most common causes.
1. Low coolant level or air in the system
On a liquid-cooled motorcycle, the coolant circulates in a closed system.
It passes through the engine, carries away the heat, and then reaches the radiator, where it is cooled by the airflow.
If there is a leak somewhere, or the system has not been filled correctly, the coolant level can become too low.
Air pockets can also remain in the system.
This is a problem, because air carries away heat far less effectively than coolant.
An air pocket around a hot part of the engine can prevent normal cooling and lead to localized overheating.
Signs can include:
- unstable temperature;
- a rapid rise in temperature;
- intermittent overheating;
- a low level in the expansion tank;
- no visible coolant in the radiator on a cold engine.
2. A faulty thermostat or a problem with the radiator fan
The thermostat
The thermostat is a temperature-controlled valve.
When the engine is cold, it restricts circulation to the radiator so the engine can reach normal operating temperature faster.
When the temperature rises, the thermostat opens and allows the coolant to pass through the radiator.
If the thermostat sticks in the closed position, the coolant cannot circulate properly to the radiator.
The result can be rapid overheating of the engine.
A characteristic sign is an engine that gets very hot while the radiator stays relatively cold.
The radiator fan
When you ride at normal speed, air passes naturally through the radiator.
But when you:
- are stopped;
- ride slowly;
- get caught in traffic;
the natural airflow is insufficient.
Then the electric fan should start running and draw air through the radiator.
If the fan doesn’t switch on, the cause can be:
- a faulty temperature sensor;
- a faulty temperature switch;
- a blown fuse;
- a faulty relay;
- a problem with the electrical supply;
- a faulty fan motor.
If the motorcycle overheats mainly in traffic, but the temperature drops as soon as you set off, the fan is one of the first things to check.
3. A dirty or damaged radiator
The radiator relies on the air that passes through its many thin aluminum fins.
They increase the area through which heat is released to the surrounding environment.
Over time, the following build up between them:
- insects;
- dust;
- mud;
- sand;
- leaves;
- road grime.
Stones can also bend the fine fins and restrict the airflow.
The less air passes through the radiator, the harder it is for it to release the heat.
That is why a dirty radiator can look like a relatively small problem, but actually lead to serious overheating.
Air Cooling vs. Liquid Cooling
Before you diagnose overheating, you need to know what type of cooling your motorcycle uses.
Air-cooled engines
On these, the cylinders and head have many metal cooling fins.
The air that passes by them while riding carries away the heat.
These systems are:
- relatively simple;
- reliable;
- with few components;
- easy to maintain.
But they have one main drawback:
their cooling depends heavily on the movement of air around the engine.
If you let an air-cooled motorcycle run for a long time while stationary in hot weather, the temperature can rise significantly.
That is why, with such an engine, you should keep an eye on:
- the cleanliness of the cooling fins;
- the level and quality of the engine oil;
- the correct fuel mixture;
- the time the engine spends at idle at high temperature.
Liquid-cooled engines
On these, the coolant passes through special passages around the hot parts of the engine.
The water pump circulates it through:
engine → radiator → engine.
This allows much more precise control over the temperature.
Liquid cooling is especially suitable for:
- sport motorcycles;
- powerful engines;
- touring motorcycles;
- modern city machines;
- engines under a high degree of load.
But the system contains more components and requires periodic maintenance.
Its main parts include:
- a radiator;
- a water pump;
- a thermostat;
- a fan;
- hoses;
- an expansion tank;
- temperature sensors;
- coolant.
What Tools You Need
Before you open the cooling system, prepare:
- new coolant suitable for a motorcycle;
- distilled water;
- a new seal or washer for the drain plug, if needed;
- a set of wrenches and sockets;
- a torque wrench;
- a clean container for the old fluid;
- a funnel;
- nitrile gloves;
- safety glasses;
- the service manual for the specific motorcycle.
It is important to use coolant that meets the manufacturer’s requirements.
Don’t automatically assume that every antifreeze is suitable for every engine.
⚠️ The Most Important Rule: Never Open a Hot Radiator
This is one of the most important rules when working on the cooling system.
When the engine is hot, the system is under pressure. The coolant temperature can be over 100°C.
If you unscrew the radiator cap on a hot engine, the pressure can suddenly eject boiling coolant and steam. This can cause severe burns.
That is why: never open the radiator cap on a hot or even significantly warmed engine.
Let the motorcycle cool down completely. When in doubt, wait longer.
Flushing the Cooling System Step by Step
The following procedure is general.
On different models, the location of the drain plug, the bleeding method, and the amount of coolant can differ.
That is why you should always check the service manual.
Step 1: Draining the old coolant
1. Position the motorcycle securely
The engine must be on a level surface and completely cooled down.
Use:
- a center stand;
- a service stand;
- or another stable way of standing the motorcycle upright.
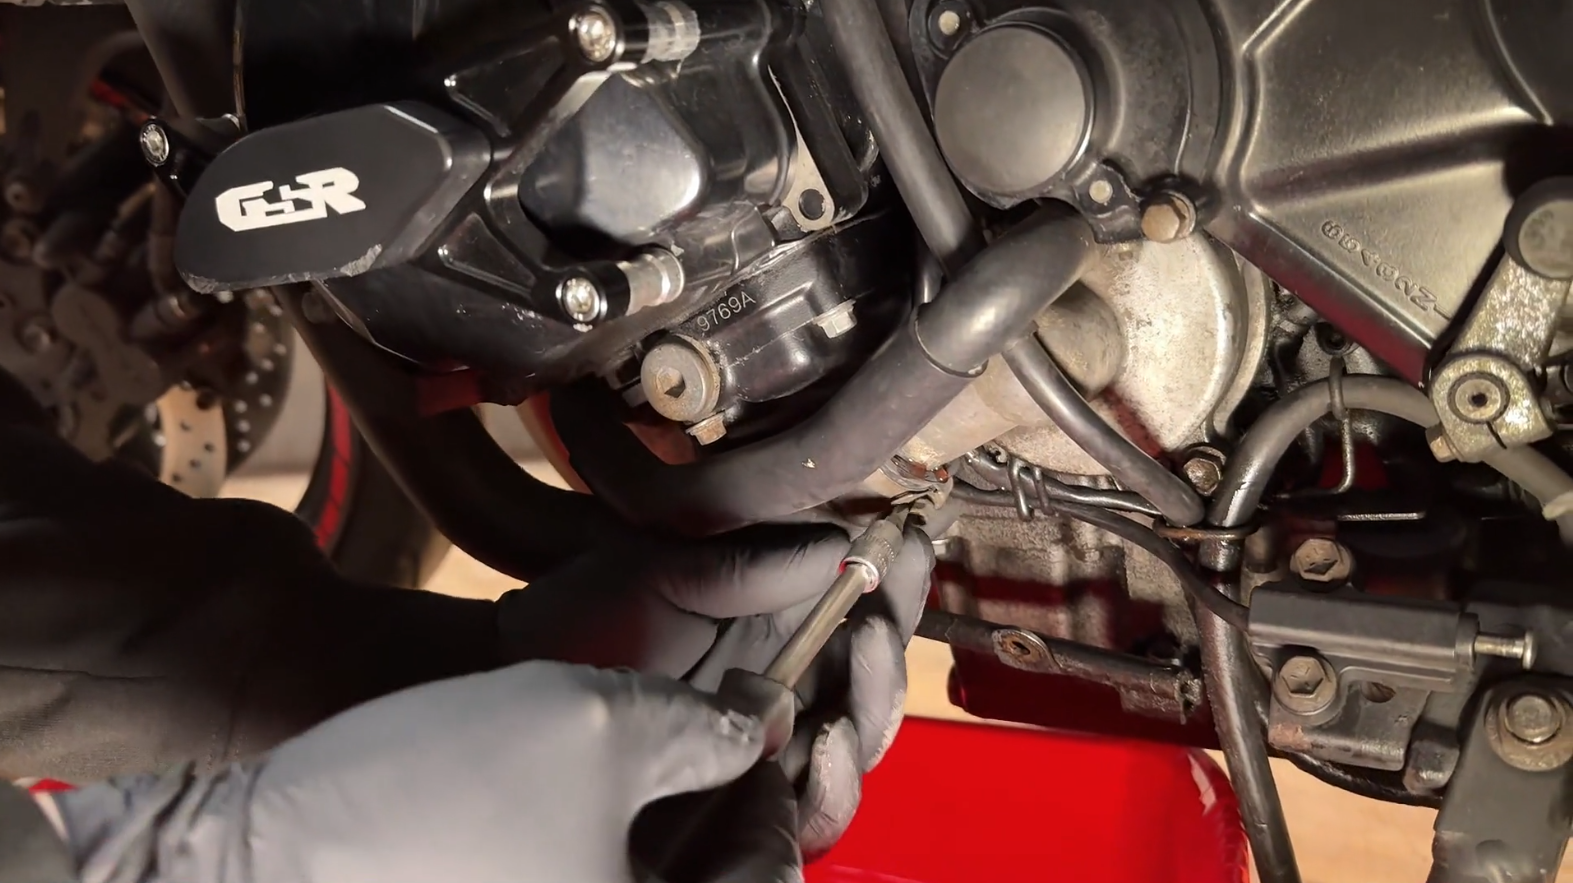
2. Locate the drain plug
On many motorcycles it is located:
- on the water pump housing;
- at the bottom of the engine;
- or at the bottom of the cooling system.
Check the exact location according to the service manual.
3. Place a container underneath
Put a sufficiently large container under the plug.
Coolant must not be poured onto the ground or into the drains.
It must be collected and handed over for proper disposal.
4. Unscrew the plug
Carefully unscrew the drain plug.
At first the fluid may drain relatively slowly.
5. Open the radiator cap
Once the plug is open, carefully open the radiator cap.
This lets air into the system and allows the coolant to start draining significantly faster.
6. Empty the expansion tank too
Old coolant also remains in the expansion tank.
Depending on the design, it can be:
- removed;
- have its own drain hose;
- emptied with a syringe or a suitable pump.
The goal is to remove the maximum amount of old fluid.
Step 2: Flushing with distilled water
If the system is relatively clean and the manufacturer does not require flushing, sometimes just replacing the fluid is enough.
If, however, the coolant is old, contaminated, or shows signs of sediment, a flush can be done.
1. Fit the plug temporarily
Put the drain plug back in.
Make sure the system is closed.
2. Fill with distilled water
Use a funnel and fill the radiator with clean distilled water.
Don’t use ordinary tap water, unless the manufacturer explicitly allows it.
Tap water can contain minerals that over time form deposits in:
- the radiator;
- the water pump;
- the engine passages.
3. Start the engine
Fit the cap according to the manufacturer’s procedure and start the engine.
Let it run long enough for the water to circulate through the system.
There is no need to rev the engine hard.
A slight increase in RPM from time to time is enough.
It is important not to let the engine overheat during the flush.
4. Let the engine cool down completely
After the flush, turn off the engine.
Before opening the system again, wait for it to cool down completely.
Then open the plug and drain the water.
If it comes out:
- rusty;
- cloudy;
- dark;
- with sediment;
you can repeat the flush with fresh distilled water.
Continue until the water that drains out becomes relatively clean.
Step 3: Refilling with new coolant
Once the flush is complete, the system must be filled and bled correctly.
1. Fit the plug correctly
If the manufacturer specifies a new sealing washer, use a new one.
Tighten the plug with a torque wrench to the value from the service manual.
Don’t tighten “by feel” if you have an official torque figure.
2. Pour in the new coolant slowly
Start pouring the coolant slowly through the radiator opening.
Slow filling helps the air escape more easily.
Fill to the level specified by the manufacturer.
Then fill the expansion tank to the corresponding mark:
MIN / MAX or LOW / FULL.
Don’t overfill.
Bleeding: How to Remove Air From the System
This is a very important part of the procedure.
If air remains inside after the change, the engine can start to overheat even with completely new coolant.
1. Follow the manufacturer’s procedure
On some motorcycles, the radiator stays open during the initial bleeding.
On others, there is a special bleed bolt.
On yet others, the motorcycle must be tilted in a certain direction.
That is why you should always check the service procedure.
2. Start the engine
If the specific system allows this with the cap open, start the engine and let it run.
As the coolant circulates, air bubbles may start to come out of the system.
3. Monitor the level
As the air comes out, the fluid level can drop.
Gradually add new coolant, without overfilling the system.
4. Carefully squeeze the hoses
With a cold or suitably cooled system, you can carefully squeeze the thicker rubber hoses.
This sometimes helps trapped air move upward.
Be careful around moving parts and hot components.
5. Wait for the air bubbles to stop
Continue according to the procedure until:
- the level stabilizes;
- there are no visible air bubbles;
- the system starts working normally.
Then fit the radiator cap correctly.
After the Change, Do a Control Check
After the service, don’t automatically assume everything is done.
Check:
- whether there is a leak around the plug;
- whether there is a leak from the hoses;
- whether there is a leak around the radiator;
- whether the fan switches on;
- whether the temperature stabilizes;
- whether the level in the expansion tank changes.
Once the motorcycle has cooled down completely after the first ride, check the coolant level again.
Sometimes residual air comes out after the first full heating and cooling cycle.
If It Keeps Overheating
If the system is filled correctly but the motorcycle keeps overheating, don’t immediately start replacing random parts.
Check systematically:
- whether the fan works;
- whether the thermostat opens;
- whether the water pump works;
- whether the radiator is clean;
- whether there is a kinked hose;
- whether there is a leak;
- whether the radiator cap holds pressure;
- whether the temperature sensor reads correctly.
In more serious cases, you should also check for:
- a damaged cylinder head gasket;
- combustion-chamber gases in the cooling system;
- oil in the coolant;
- coolant in the engine oil.
⚠️ Don’t Rely on the Temperature Light Alone
Some motorcycles have a digital temperature display. Others have only a warning light.
If the high-temperature light comes on, it already means the system has reached a critical zone.
In that case:
- Stop in a safe place.
- Turn off the engine.
- Don’t open the radiator cap.
- Let the engine cool down.
- Look for the cause of the overheating.
Don’t keep riding in the hope that “it will fix itself”.
The Next Step Toward Better Understanding of Your Engine
Being able to service the cooling system means significantly more than just changing the coolant.
When you understand how the following work:
- the water pump;
- the radiator;
- the thermostat;
- the fan;
- the temperature sensors;
you start to be able to actually diagnose why the engine is running hot.
And that can save you not only an unpleasant wait at the roadside, but also serious engine damage.
In the Shadow Rider Garage Masterclass we go through motorcycle maintenance and diagnostics step by step.
In the practical video lessons you will learn how to:
- service the cooling system;
- change the coolant;
- check the operation of the fan;
- diagnose temperature sensors;
- check the thermostat;
- find electrical problems;
- recognize the early signs of overheating;
- perform basic engine tuning and diagnostics.
The goal is not just to know how to top up the coolant.
The goal is to understand why the engine runs hot and how to systematically find the cause before a small problem turns into an expensive repair.