
The ultimate goal of your motorcycle’s drivetrain is one thing – to transfer the engine’s power efficiently and safely to the rear wheel, and from there to the asphalt.
Several important components work along this path: the clutch, the transmission, the chain and sprockets, and finally the tire, which has to put that force down onto the road.
If the clutch is slipping, the chain is too loose or worn, or the tires no longer have enough grip, part of the engine’s power simply doesn’t reach the asphalt effectively. In more serious cases, the problem is no longer just about how the bike behaves – it’s about safety.
One of the most telling symptoms is a slipping clutch:
You twist the throttle, the engine revs climb sharply, but the motorcycle doesn’t accelerate proportionally.
In this guide we will look at:
- how to recognize a slipping clutch;
- how to check the clutch cable adjustment;
- how to spot a worn chain and sprockets;
- how to check the age and wear of your tires;
- which signs you should never ignore before a long trip.
How to Recognize a Slipping Clutch
The clutch connects the engine to the transmission. On most motorcycles it is built from a stack of alternating:- friction plates;
- steel plates.
High-Gear Clutch Slip Test
One of the easiest ways to check whether the clutch is slipping is through acceleration under load. Only perform this test on a safe, open, and clearly visible stretch of road.How to do it
Ride at a relatively low speed – for example around: 40–50 km/h Engage a higher gear, for example: 4th or 5th Then smoothly but firmly apply more throttle. Watch both at the same time:- the engine RPM;
- the actual acceleration of the motorcycle.
What does a slipping clutch look like?
If the revs rise sharply but the bike’s speed increases much more slowly, there is a serious chance the clutch is slipping. With a healthy clutch, the rise in RPM should be directly linked to the acceleration of the bike.Cable Adjustment or Worn Plates?
Before ordering a new set of clutch plates, check something much simpler: the freeplay at the lever. If the clutch cable is adjusted too tightly, the mechanism may constantly hold the clutch slightly disengaged. In practice this is almost the same as constantly holding the lever pulled in ever so slightly. The result can be slipping, especially during:- hard acceleration;
- high gears;
- climbing;
- riding with a passenger or luggage.
Check the freeplay
On many motorcycles there should be a small amount of freeplay at the lever before the cable actually starts to pull the clutch mechanism. A common rough guideline is around: 2–3 mm But the exact value depends on the specific model. Always check the specification in your motorcycle’s service manual. If the clutch keeps slipping after proper adjustment, the possible causes include:- worn friction plates;
- overheated or “glazed” friction surfaces;
- weakened springs;
- warped steel plates;
- unsuitable engine oil in a wet clutch.
Chain and Sprockets – How to Recognize Wear
On chain-driven motorcycles, the chain and sprockets carry an enormous load. They constantly transfer the torque from the engine to the rear wheel. That is why they need regular:- inspection;
- adjustment;
- cleaning;
- lubrication.
Worn Chain Test
There are a few easy checks you can do yourself.1. The tug test from the rear sprocket
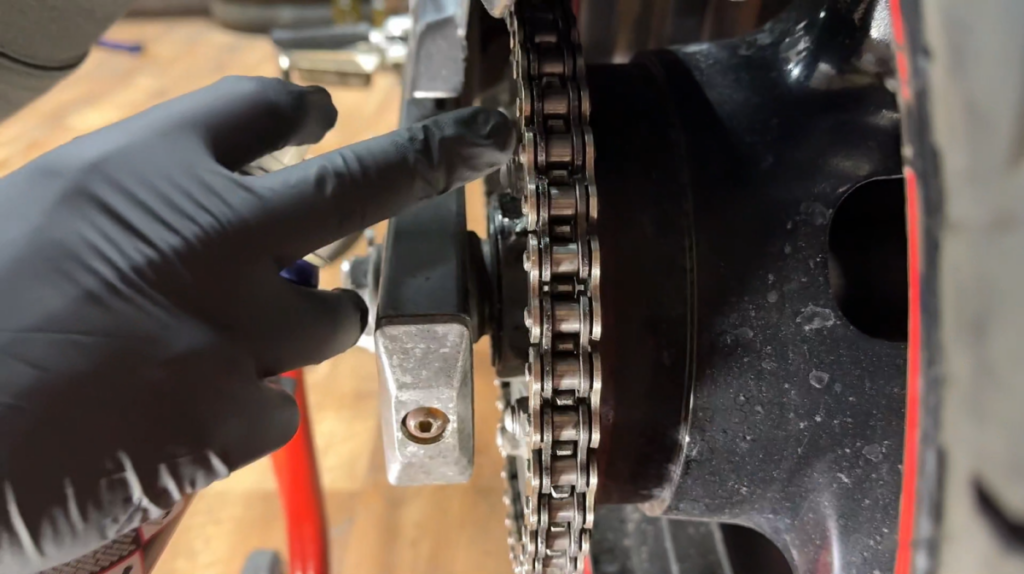
Grab the chain at the very rear of the rear sprocket and pull it backward. On a healthy chain, it should stay relatively tight around the teeth. If you can pull the chain far enough to expose a large part of a sprocket tooth, that is a sign of serious wear. Don’t rely on this test alone, though – it’s only a rough guide. Combine it with a check of:- the chain slack;
- the condition of the links;
- the shape of the teeth;
- the manufacturer’s service tolerances.
2. “Shark-fin” teeth
Look carefully at the teeth on the front and rear sprockets. On a healthy sprocket, the teeth should have a fairly even and symmetrical shape. If they start to look:- too sharp;
- elongated;
- bent to one side;
- like a “shark fin”;
Chain and sprockets are replaced as a set
If you fit a new chain onto heavily worn sprockets, the old teeth will accelerate the wear of the new chain. The same applies the other way around. That is why, with serious wear, the usual correct approach is to replace: front sprocket + rear sprocket + chain as a set.3. Check for tight spots
Position the motorcycle securely so that the rear wheel can be safely rotated according to the design of that specific bike. Rotate the wheel slowly and watch the chain. If in one spot it is normally slack, but after turning the wheel it suddenly becomes much tighter, there may be: tight or frozen links. This indicates uneven wear of the chain. That is why chain slack is usually checked at its tightest point. A chain with badly frozen links, or a large difference between individual sections, must be replaced.Motorcycle Tires – The Only Connection to the Asphalt
A motorcycle has two relatively small contact patches with the road. Both are made of rubber. That is why the condition of the tires directly affects:- braking;
- acceleration;
- cornering;
- stability;
- behavior on a wet road.
- the pressure;
- the tread depth;
- uneven wear;
- cracks;
- hardening;
- deformations;
- the age of the tire.
How to Read the DOT Code on a Tire
On the tire’s sidewall you can find a manufacturing code. On tires using the standard four-digit date marking, the final four digits show the week and year of manufacture. For example: 2422 means: 24 – the 24th week; 22 – the year 2022. So the tire was manufactured in the 24th week of 2022.An old tire can still have tread and not be safe
A tire ages even when the motorcycle is barely ridden. Over time, the rubber may:- harden;
- lose some of its elasticity;
- start to crack;
- offer weaker grip.
- the condition of the rubber;
- how it was stored;
- the mileage;
- visible damage;
- the manufacturer’s recommendations.
What Are the TWI Wear Indicators
Inside the tread grooves there are small raised sections. These are the Tread Wear Indicators – TWI. On the tire’s sidewall there is often a small TWI marking that shows where they are located. When the tread surface wears down level with the indicator, the tire is already heavily worn and must be replaced. Don’t wait for the tire to go completely bald. As the tread depth decreases, so does the tire’s ability to channel away water. This increases the risk of losing grip and hydroplaning on a wet road. The legal requirements for minimum tread depth differ by country and vehicle category, so always check the current local requirements.💡 Before a Long Trip, Check These Three Things
Before a serious ride or a motorcycle tour, take a few minutes for three basic checks.
Clutch
Check the freeplay at the lever; whether it disengages properly; whether the revs climb without matching acceleration.
Chain and sprockets
Check the slack; the lubrication; tight links; the shape of the teeth; the overall condition of the set.
Tires
Check the pressure on cold tires; the tread; the TWI indicators; cracks and damage; the DOT date; uneven wear.
These are a few minutes of checking that can prevent a serious problem hundreds of kilometers from home.
Close the Full Circle of Motorcycle Maintenance
Understanding the engine is important. But it’s just as important to understand how its power reaches the asphalt. The clutch has to transfer the torque to the transmission. The chain and sprockets have to pass it on to the rear wheel. And the tire has to turn that force into real acceleration, braking, and control of the motorcycle. When you understand this whole process, you start to see the motorcycle as one complete system, rather than as separate parts.Learn to Understand the Condition of Your Own Bike
If you’re tired of wondering: “Is this normal?” “Is my chain due for replacement?” “Is the clutch slipping?” “Are these tires still safe?” the goal of the Shadow Rider Garage Masterclass is to give you the practical knowledge to make an initial assessment of your motorcycle’s condition yourself. In the course, we go step by step through the main systems of the bike – from basic servicing and fluids to the electrical system, the drivetrain, the clutch, the chain, and the tires. In MODULE 7: Clutch, Tires, and Chain, you will learn how to:- recognize the symptoms of a slipping clutch;
- check and adjust the freeplay;
- assess the condition of the chain;
- recognize worn sprockets;
- inspect the tires correctly;
- read the DOT marking;
- recognize the signs when a part should no longer be used.