
Seeing an oily ring on the shiny chrome tubes of your front fork is not good news for any rider.
Your motorcycle’s front suspension doesn’t just soak up bumps in the road. It has a far more important role:
- it keeps the front tire in constant contact with the asphalt;
- it stabilizes the motorcycle under braking;
- it directly affects how the bike behaves in corners;
- it helps the front end follow your chosen line precisely.
When the fork seals start to leak, the oil inside the fork gradually escapes.
This can seriously degrade the handling of the motorcycle, cause excessive nose-diving under hard braking, and in the worst case allow oil to reach the brake rotor or the pads.
And that can sharply reduce braking effectiveness.
In this article we will look at:
- how to recognize the early signs of a seal problem;
- a quick trick that sometimes stops the leak without disassembly;
- when a full fork rebuild is actually needed;
- which other suspension components wear out over time.
Symptoms: How to Recognize a Failing Fork Seal
Suspension problems often develop gradually.
That is exactly why they can easily go unnoticed until the behavior of the motorcycle starts to change noticeably.
There are a few clear signs you should watch for.
Visual signs: light weeping or an active leak
On a properly working fork, the chrome tube should be practically dry.
If, after a ride, you notice a thin dark ring of dust and oil around the tube, it usually means the seal is starting to weep slightly.
This is often called the seal “sweating”.
If, however, there are already visible drops of oil running down the fork toward the brake caliper, the leak is serious and the problem should be fixed as soon as possible.
It is especially dangerous if the oil reaches:
- the brake rotor;
- the brake pads;
- the tire.
In that case, the motorcycle should not be used until the problem is fixed and the contaminated brake components have been inspected.
Change in behavior: excessive diving and an unstable front end
The oil in the fork plays a key role in damping.
In other words, it controls how quickly the fork compresses and rebounds.
When the amount of oil decreases, the fork loses part of its ability to control movement.
When you apply the front brake, you may feel the front end:
- dive too quickly;
- dive too deeply;
- become unstable;
- spring back up too abruptly after you release the brake.
When cornering, the bike may start to feel:
- uncertain;
- imprecise;
- “soft” at the front;
- unstable over bumps.
The front tire may start to skip or lose smooth contact with the surface when going over bumps in a corner.
This is a sign that the fork no longer properly controls the movement of the wheel.
💡 The 30-Second Trick Before Replacing the Seals
Before you disassemble the entire front fork, there is something very simple worth checking.
Sometimes the seal is actually not torn or worn out. It’s possible that dirt has simply lodged under its sealing lip.
While riding, dust, sand, small stones, insects, and other road grime build up on the chrome tube.
Some of this contamination can slip past the outer dust wiper and get trapped under the main seal. A very small particle is enough to lift the seal’s lip and open a microscopic gap through which oil starts to escape.
Cleaning with a special fork seal tool
This procedure can help if the cause is simply trapped dirt.
1. Carefully lift the dust wiper
At the bottom of the tube there is an outer rubber seal that protects the main seal from dust and dirt.
It can be carefully lifted with a plastic tool.
It is not a good idea to use a metal screwdriver directly on the chrome tube.
A single scratch on it can later permanently damage the seal and cause leaks.
2. Use a fork seal cleaning tool
The best option is a special plastic tool for cleaning fork seals.
It is thin, flexible, and shaped so it can slide between the seal and the tube.
As a temporary alternative, a thin piece of smooth, flexible plastic can be used carefully.
It is important that the plastic has no sharp edges that could damage the rubber seal.
3. Carefully insert the plastic under the seal lip
Slide the tool between the chrome tube and the sealing lip of the seal.
Don’t force it.
The goal is not to stretch the seal, but only to remove the contamination trapped underneath it.
4. Rotate the tool around the entire tube
Guide it carefully 360° around the tube.
This way you can extract small particles of dust and sand that keep the seal from sitting tightly.
5. Clean and check again
Remove the tool.
Often there will be small particles of dirt on it.
Wipe the chrome tube well, then push the front end down several times so the fork makes a few full strokes.
Then clean again and check whether new oil appears.
If the leak has stopped, the problem was probably just contamination under the seal.
If oil keeps coming out, the seal is most likely already damaged or worn out.
When Is It Time for a Full Fork Rebuild?
If cleaning doesn’t help, the rubber seal is probably already:
- hardened with age;
- cracked;
- worn out;
- mechanically damaged.
In this case, the fork needs to be removed and serviced.
It is important to know, however, that there are other components inside it that wear out over time.
When disassembling, it is not good practice to simply replace the seals and ignore everything else.
Fork oil
The oil in the fork works under constant load.
With every compression and rebound, it passes through small valves and openings, controlling the speed at which the suspension moves.
Over time, the oil:
- ages;
- gets contaminated;
- changes its viscosity;
- loses part of its damping properties.
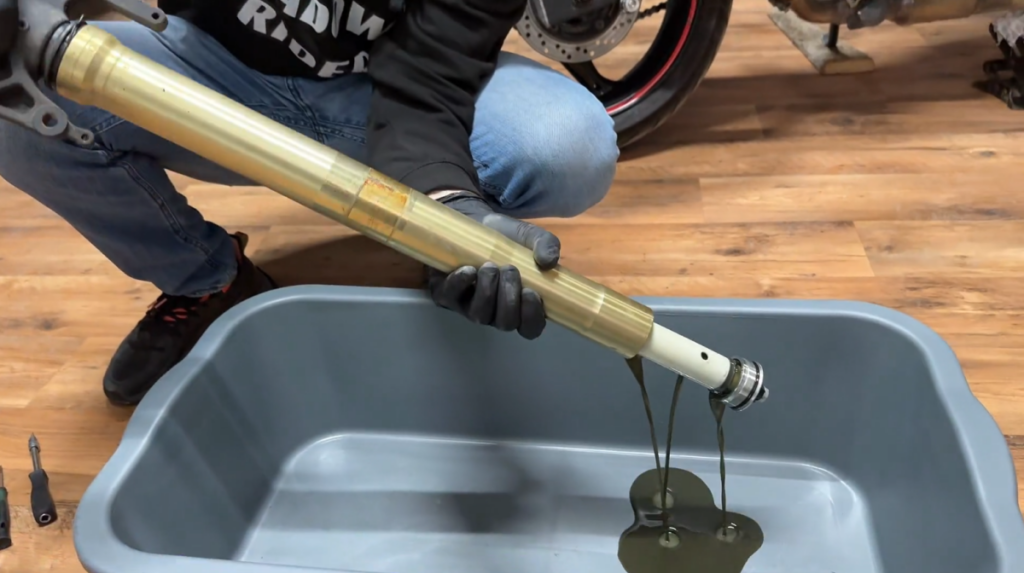
Old oil often turns dark gray or black and may have an unpleasant smell.
This is no longer just a matter of cleanliness.
The changed viscosity directly affects the way the fork works.
That is why, when replacing seals, the oil must be replaced with the correct type and amount specified by the manufacturer.
Guide bushings
Inside the fork there are special guide bushings, which allow the inner and outer tubes to move relative to each other with minimal friction.
They are usually metal bushings with a special anti-friction coating.
Over time, this coating wears down.
When a bushing becomes too worn, play develops between the components of the fork.
This can lead to:
- imprecise guidance of the tubes;
- accelerated wear of the seals;
- scratches on the working surfaces;
- lateral play;
- degraded front-end behavior.
When disassembling, the bushings should be carefully inspected and replaced if necessary.
Fork springs
The springs take a large part of the physical load of the motorcycle and the rider.
Over time, they can gradually lose part of their original height and characteristics.
This can lead to excessive nose-dive even under normal load.
The result is a change in the geometry of the motorcycle and the way it corners and brakes.
On older motorcycles, or with incorrectly chosen springs, they may need to be replaced.
⚠️ The Seal Isn’t the Only Possible Cause of a Leak
Before automatically ordering a new set of seals, inspect the chrome tube carefully.
If there is rust, deep scratches, dents, or marks from a stone impact on it, even a new seal can very quickly start leaking again.
With every movement of the fork, the damaged spot passes through the seal and can injure its rubber lip. That is why a proper repair always starts with an inspection of the entire working surface.
What a Properly Set-Up Front Suspension Means
Many riders view suspension setup as some kind of “black magic”.
In reality, there is fairly simple mechanics behind it.
A properly set-up fork should allow the front wheel to follow the surface, without:
- diving too easily;
- rebounding too quickly;
- skipping;
- losing contact with the road.
That is why, in addition to the technical condition of the seals and the oil, the following settings are also important:
- the spring preload;
- compression;
- rebound;
- static and rider sag – sag.
Not every motorcycle has all of these adjustments, but the principle stays the same:
the suspension must be set up according to the motorcycle, the riding style, and the weight of the rider.
The Next Step Toward Better Understanding of Suspension
Working on the front suspension often looks complicated to people who have never taken a fork apart.
But when you understand how the individual components work and follow the correct sequence, the system becomes much easier to understand.
A properly serviced fork can completely transform the feel of the motorcycle.
It becomes:
- more stable under braking;
- more precise in corners;
- more predictable over bumps;
- more confident during more dynamic riding.
If you want to stop seeing suspension work as something that must always be left to a shop, in the Shadow Rider Garage Masterclass we go through the whole process step by step.
In the detailed video lessons you will learn how to:
- diagnose a leak from the front fork;
- remove the fork safely;
- replace the seals;
- inspect and replace the guide bushings;
- replace the oil correctly;
- reassemble the fork in the correct sequence;
- measure and set the sag according to the motorcycle and the rider’s weight.
The goal is not just to replace one leaking seal.
The goal is to understand how the front suspension works and how it affects the entire motorcycle.